Step-by-Step Fire Extinguishers Maintenance and Inspection Guide
Fire extinguishers are one of the most essential safety tools in any home, workplace, or commercial setting. However, simply having them installed is not enough—regular maintenance and inspection are critical to ensure they function effectively during emergencies. A neglected extinguisher can fail when needed the most, putting lives and property at risk. This step-by-step guide will help you understand how to properly maintain and inspect fire extinguishers for optimal performance and safety.
Why Fire Extinguisher Maintenance Matters
Fire extinguishers are often overlooked until an emergency occurs. Over time, factors such as pressure loss, corrosion, or physical damage can reduce their effectiveness. Routine inspection ensures that the extinguisher is fully operational, compliant with safety standards, and ready to use at any moment. Regular checks also help in identifying minor issues before they turn into costly replacements.
Step 1: Check the Accessibility
The first step in fire extinguisher inspection is ensuring that it is easily accessible. The extinguisher should be placed in a visible and designated location, free from obstructions such as furniture, storage boxes, or equipment. In workplaces, signage should clearly indicate its location. Easy access can make a significant difference during emergencies when every second counts.
Step 2: Inspect the Physical Condition
Carefully examine the exterior of the extinguisher. Look for signs of damage such as dents, rust, corrosion, or leakage. The hose and nozzle should be intact and free from cracks or blockages. Any visible damage may compromise the extinguisher’s functionality and should be addressed immediately. If the cylinder appears compromised, it may need professional servicing or replacement.
Step 3: Verify the Pressure Gauge
Most fire extinguishers come with a pressure gauge that indicates whether the unit is properly charged. The needle should be within the green zone, which signifies adequate pressure. If the needle is in the red zone—either too high or too low—the extinguisher may not function correctly. In such cases, it should be serviced or replaced promptly.
Step 4: Check the Safety Pin and Seal
The safety pin prevents accidental discharge and ensures the extinguisher is ready for use. Make sure the pin is securely in place and sealed with a tamper indicator. If the seal is broken or missing, it could mean the extinguisher has been used or tampered with. This requires immediate attention and possibly recharging.
Step 5: Examine the Label and Instructions
Every fire extinguisher should have a clear and legible label with operating instructions. Over time, labels may fade or become damaged. Ensure that all instructions are easy to read and understand. This is especially important for individuals who may not be familiar with using fire extinguishers during an emergency.
Step 6: Check the Weight
Lifting the extinguisher can help determine if it is still full. If it feels lighter than expected, it may have lost some of its contents due to leakage or previous use. Comparing the current weight with the manufacturer’s specified weight (usually mentioned on the label) can help confirm its status. If there is a noticeable difference, the extinguisher should be refilled or replaced.
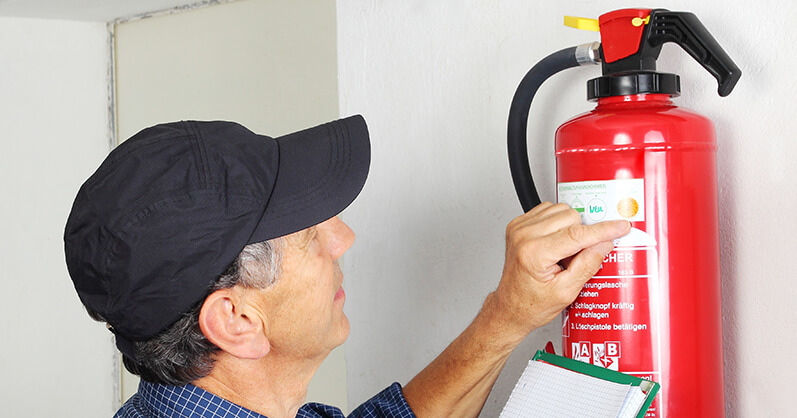
Step 7: Inspect the Inspection Tag
Most fire extinguishers come with an inspection tag that records the history of maintenance and servicing. Review the tag to ensure that regular inspections have been conducted. Monthly visual checks and annual professional servicing are generally recommended. Keeping this record updated is crucial for compliance and accountability.
Step 8: Perform a Shake Test (If Applicable)
For certain types of extinguishers, such as dry chemical units, gently shaking the extinguisher can help prevent the powder inside from settling or clumping. This ensures smooth discharge when needed. However, always follow the manufacturer’s guidelines before performing this step, as not all extinguishers require shaking.
Step 9: Schedule Professional Servicing
While routine inspections can be done independently, professional servicing is essential for a thorough evaluation. Certified technicians can perform detailed checks, including internal inspections and hydrostatic testing if required. Engaging experts such as Fire System Services ensures that your extinguishers meet all safety standards and regulations.
Step 10: Replace When Necessary
Fire extinguishers do not last forever. Most units have a lifespan of 5 to 15 years, depending on the type and maintenance. If an extinguisher is outdated, damaged, or fails inspection, it should be replaced immediately. Investing in new equipment is far safer than relying on a faulty unit during emergencies.
Best Practices for Ongoing Maintenance
Consistency is key when it comes to fire extinguisher maintenance. Establish a routine inspection schedule—monthly visual checks and annual professional servicing are ideal. Train employees or household members on how to use and inspect extinguishers properly. Additionally, keep a checklist to ensure no step is missed during inspections.
Conclusion
Fire extinguishers are a critical component of any fire safety plan, but their reliability depends entirely on proper Fire extinguishers maintenance and inspection. By following this step-by-step guide, you can ensure that your extinguishers remain in optimal working condition. Regular checks not only enhance safety but also provide peace of mind knowing you are prepared for unexpected situations. Taking proactive measures today can make all the difference in protecting lives and property tomorrow.
.jpg)

Comments
Post a Comment